Wednesday, July 29, 2009

Peg Bag


I've been promising myself for months that I'd make my family a peg bag.
When we moved into our current home I was heavily pregnant, it was the end of summer, and stinking hot. The two Hills Hoists at the back of our block came complete with pegs, that stayed on the lines all day every day. Over the year or so that we've been here, the unrelenting sun, rain and frost has taken its toll. The plastic has degraded and every day I find more tiny, bright shards of peg death on the ground.

So I finally bit the bullet, googled 'peg bag pattern' and decided to make a simple version of the simplest pattern I could find (Easy Gratification, your home is Here).

More involved heads than mine decided to ditch a large pile of "Medieval" tabards from my local groups' loaner pile some months ago, possibly because they all appear to be made for someone over six feet tall with the constitution of a rake. Somehow, I ended up with the pile. One of these came in very handy when I needed fabric for this project!


Every fabric I touch needs to be embroidered, these days! The bird is a slightly altered freebie pattern I got from Badbird and the word is just one of the free fonts I got on my copy of Windows.
I'm slowly making my little word that much prettier.

Wednesday, July 22, 2009

Cool

As a lover of natural fibres and all their glory (thankyou for that, Medieval Re-enactment), I am no stranger to The Burn Test.
Briefly, for those uninitiated, this is where you're not sure of a material's natural or man-made properties, so you take a small sliver of it and apply a flame. Natural fibres burn and create ash, man-made melt and leave puddles and/or beads of crud.

Griffin Dye Works has a nifty little guide to Burn Test results, to help you figure out things a step further than "natural" vs "man-made", which includes an all too important "poisonous fumes" box! Nifty.

Thursday, July 16, 2009

Matching Kitchen Queen Strawberry set

I bought a teatowel set a little while ago - I liked the colours, and thought about decorating them and gifting them to people.


So when I heard that one of my friends, who is very handy in the kitchen, turned out to be having a rough week (or two), I thought it would be a good time to make good on that idea - and whilst I was at it, I'd make her an apron, to match.
Red was my basic inspiration - to warm up this cold winter weather! My partner helped me pick out the other fabrics - which was mainly about choosing which of the fabulous quilting cottons I have hoarded would be best for this project. We decided on the dramatic strawberries on black. Which naturally lead to my doing a giant strawberry applique/embroidery on the apron.


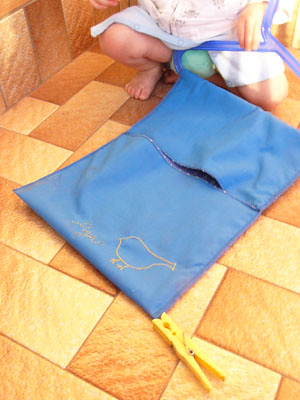
As it turned out, I ended up bullying him into not only helping choose fabric, but also decorating the teatowel, as I decided I wanted to concentrate on doing the apron. I'd never done one before, and was using one of mine as a base, with calico for the inner lining. It's not a hard project, but I was hoping to get the whole thing done in a night or two at most. Besides, the family that crafts together is happy together. Er, aren't they?

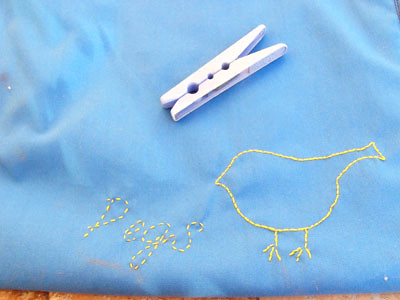
I'm really proud of his efforts on the teatowel. He's got a good eye for design and colour (though he sometimes confuses his taste and mine. The seventies are SO not my decade!). The only input I had was minor technical help with threading the sewing machine, checking the tension when he was worried something was amiss, and a tiny bit of help with winding a bobbin (Yes! He did that, too! He ran out halfway through, so he had to). Considering it was the second project he's done (and the first was just a hem), I'm very proud of his craftiness.


For myself, I got to practice a little more of my hand embroidery skills; the top of the strawberry applique is a chainstitch - one of the four I know. And I really enjoyed thinking very technically about the placement of straps, and reinforcing, and shape - although I used an apron of mine as a basic for the pattern it was the jumping-off point and the final piece is an entirely different creature (apart from the fact they're both basically aprons).

I really feel like I can trace the evolution of my sewing skills, this year. I can see a real difference in the quality of what I'm producing, and I'm becoming more confident with things like pleating and lining.

Anyway, I hope my friend gets a lovely surprise when she finds it in her mailbox, and that she enjoys swanning about her kitchen feeling Strawberry-tastic!

Tuesday, July 14, 2009

About that resolution...

...the one I made at the start of the year?


On my latest project I discovered that when experienced tailors and seamsters bang on about taking triangles out of your seam allowance around curves to allow for a better curve to the over-all project they aren't kidding around. It really does make a difference! Who knew?

Sunday, July 5, 2009

P.S.

You have almost no time left in which to enter the giveaway at Little Munchkins for an Oliver + S pattern (yes! awesome, cute giveaway from an Aussie blog!).

Saturday, July 4, 2009

Inspiration; Boys from the past

There's heaps of cute stuff you can sew for girls, not so much for boys, it seems. I'm plugging away at this problem, and lately I've started looking at some historical styles for ideas.
Today I found this great found photographs profile on flickr, which is chock-full of inspiration!

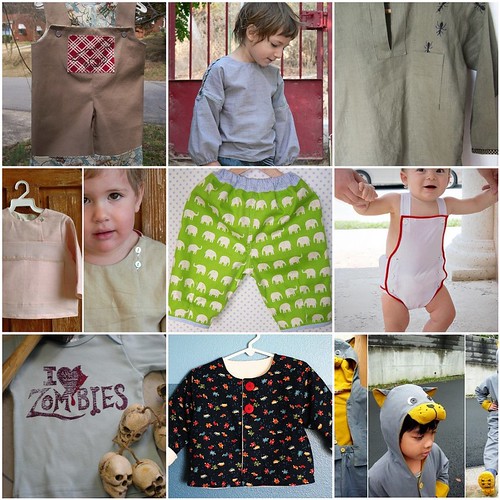
I've been playing with the idea of a sailor suit for a little while, and thinking about how the neckline on a top would work. So it was cool to find this collection of photographs from Denmark (I think?) featuring lots of little boys in sailor suit-esque clothes. Check out the pants in that second shot, too! LURVE the button embellishments on the outside of the shorts legs, though I'd like to lengthen the short if I was going to do something similar.

I also really like the front of the coat the little boy in the front right of this photo is wearing - the decorative double-breasted look and the short waist is really sweet, especially with the over the knee, tight pantaloon.

Of a slightly more recent age (but still cute) are these shorts with attached braces (thought again, I'd like to see them around knee length, instead of teeny tiny 60s-style).

And I can't decide if I actually like these two pictures, or if it's the kid's slightly guilty expression that's giving me a fit of the giggles, and making the clothes seem more appealing.

Surely if it were the cuteness though, I'd be wanting reproduce the outfit of the marshmallow baby pictured here? Zie's so squishy! Like a baby marshmallow!

Wednesday, July 1, 2009

Cloth pads, redux


I've been using a mix of cloth and plastic/paper pads for several years now, and since I had a break in my line-up of Needful Sewing, thought I'd try out a new pattern with some scraps of blue flannel and some old towels.

You can find heaps of places to purchase your own versions of these online, or patterns and suggestions on how to make them. I know some people feel a bit squicked out at the thought, but we use cloth nappies (also super cute and probably much comfier) and I think they're far grosser, to be honest. With the cloth, I save money and environmental landfill space. They also feel nicer (if bulkier) and don't smell. Plus, I'm not worried about all the chemical residues on commercial pads near my delicate parts!

For myself, since I'm using a mix I traced around a commercial pad onto a piece of paper to get a pattern - then I can retrace to change the shape to suit me better, as I see fit, etc.

The only thing is that I don't have a snap-press, so I'm using sew-on press-studs. They can look a bit ugly, so I'm trying to figure out a nice way to hide the stitching behind them.